Custom events and properties
Nexly records pageviews and engagement automatically once the SDK is installed. Those built-in events carry their own SDK metrics (scroll depth, click tags, and similar) — you do not add your own fields to them.
Custom events and custom properties are a separate track: product actions you define yourself (checkout_completed, newsletter_subscribed) with extra fields such as plan name, cart value, or experiment variant. Your payload travels in a dedicated custom-data slot (cdata), not in the built-in event payload.
This guide covers sending custom events from your app, approving them in the dashboard, and seeing them in analytics.
Custom events vs custom properties
| Concept | What it is | Example |
|---|---|---|
| Custom event | A named action you care about | checkout_completed, newsletter_subscribed |
| Custom property | Extra information on a custom event | plan_id, amount_cents, variant |
Send custom properties with a custom event through customEvent(name, { … }). Automatic pageviews, clicks, and other built-in events do not collect them on their own.
Step 1 — Send events from your app
Install the SDK for your stack first (see Installation in your property settings). Then emit custom events where the action happens.
The recommended API is customEvent. It always sends an event_type of custom:
import { Nexly } from '@nexly/web'

const client = Nexly.init({
  appId: 'your-app-id',
  key: 'your-ingest-key',
})

client.customEvent('checkout_completed', {
  plan_id: 'pro',
  amount_cents: 4200,
  currency: 'USD',
})
In React, use the hook from @nexly/react-web:
import { useNexlyClient } from '@nexly/react-web'

function PricingButton() {
  const client = useNexlyClient()
  return (
    <button
      data-nexly-ignore
      onClick={() =>
        client.customEvent('pricing_cta_clicked', {
          placement: 'hero',
          variant: 'B',
        })
      }
    >
      Get started
    </button>
  )
}
Add data-nexly-ignore when you already send your own event for that element. Without it, Nexly's auto-click tracking may also record a generic engagement event for the same click.
Property value rules
Custom properties must be flat scalars — string, number, or boolean. Numbers and booleans are normalised to strings on the server. Nested objects, arrays, and null are dropped silently.
Attribution keys vs custom properties
Standard marketing attribution belongs in the optional third context argument, not in custom properties:
client.customEvent(
  'signup_clicked',
  { source_section: 'pricing' },
  { utm_source: 'newsletter', utm_campaign: 'q2-launch' },
)
The attribution keys context accepts are: utm_source, utm_medium, utm_campaign, utm_content, utm_term, gclid, gad_source, gad_campaignid, fbclid, msclkid, ttclid, li_fat_id, yclid, mc_cid, and ref. The slot also carries the standard identifier and technical fields described in the event model — the server keeps everything on that allowlist and silently drops the rest.
:::warning Keys outside the context allowlist are dropped silently
A key outside the allowlist does not reach analytics and does not appear under Discovered — there is no error and no trace. Your own campaign, promo, or affiliate codes (an internal ref code, an affiliate code, a partner ID) are custom properties, even if they look like marketing parameters. Send them in the properties object so they are stored and show up in the Properties breakdown.
:::
URL query parameters are not collected automatically
Nexly reads the landing URL on its own: utm_* parameters power the Acquisition widget's Campaigns breakdown, and ad click identifiers such as gclid and fbclid classify the visit into a paid channel. Other attribution keys from the list above are stored with the event but do not drive the Acquisition widget. Any other query parameter (for example ?promo=spring or an affiliate code in the URL) is not captured automatically. To analyze it, read the value in your code and send it as a custom property on your events.
Naming rules
Use the same format for event names and property keys — this is what the dashboard expects when you add or approve entries:
- Lowercase letters, digits, underscores, dots, and hyphens
- Must start with a letter or digit
- Maximum 64 characters
Good: checkout_completed, plan_id, video.percent_watched
Avoid: Checkout Completed, planId, my/event
Step 2 — Approve events and properties
Nexly only stores custom events you have approved. When your app sends an event name that is not on the approved list yet, it appears under Discovered in property settings. Until you approve it, that event does not enter analytics (the collector still accepts the request, but the event is not saved).
Custom properties work the same way: only approved keys are stored on your custom events and show up in the Properties tab of the Custom analytics widget. Unapproved keys appear under Discovered on the Custom data page until you approve or ignore them.
Open your property, go to Settings, then Custom events or Custom data.
Custom events
The Custom events page lists every event name your app has sent or that you added manually.
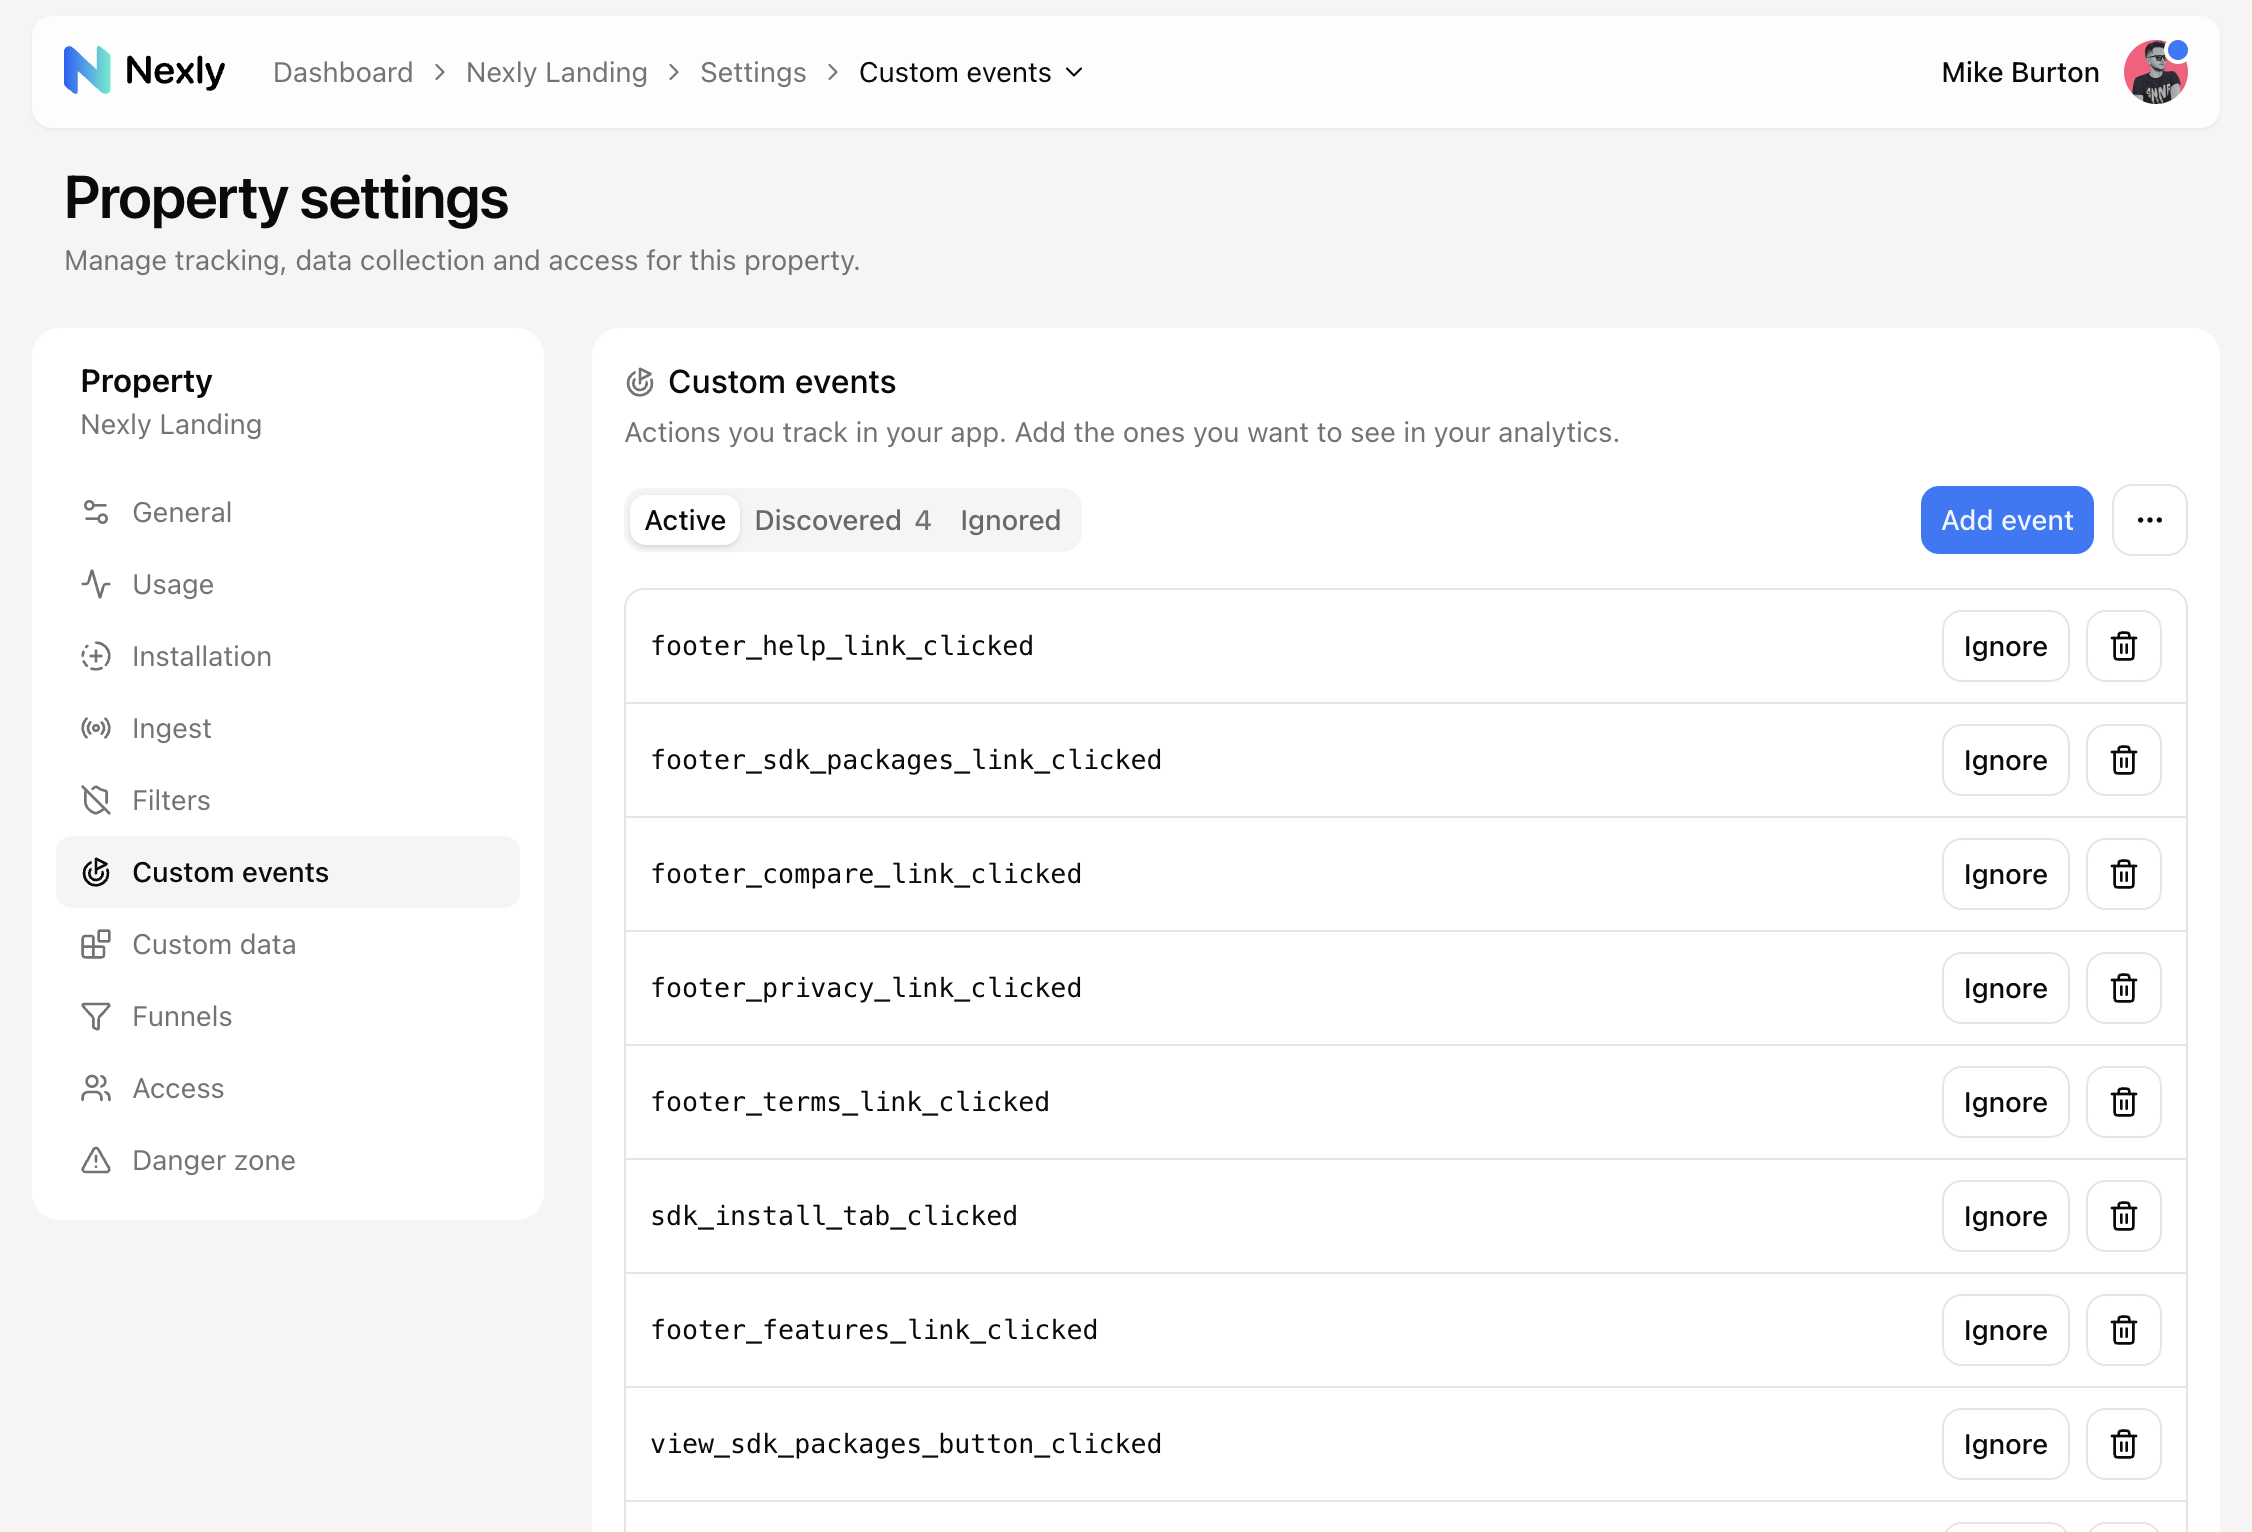
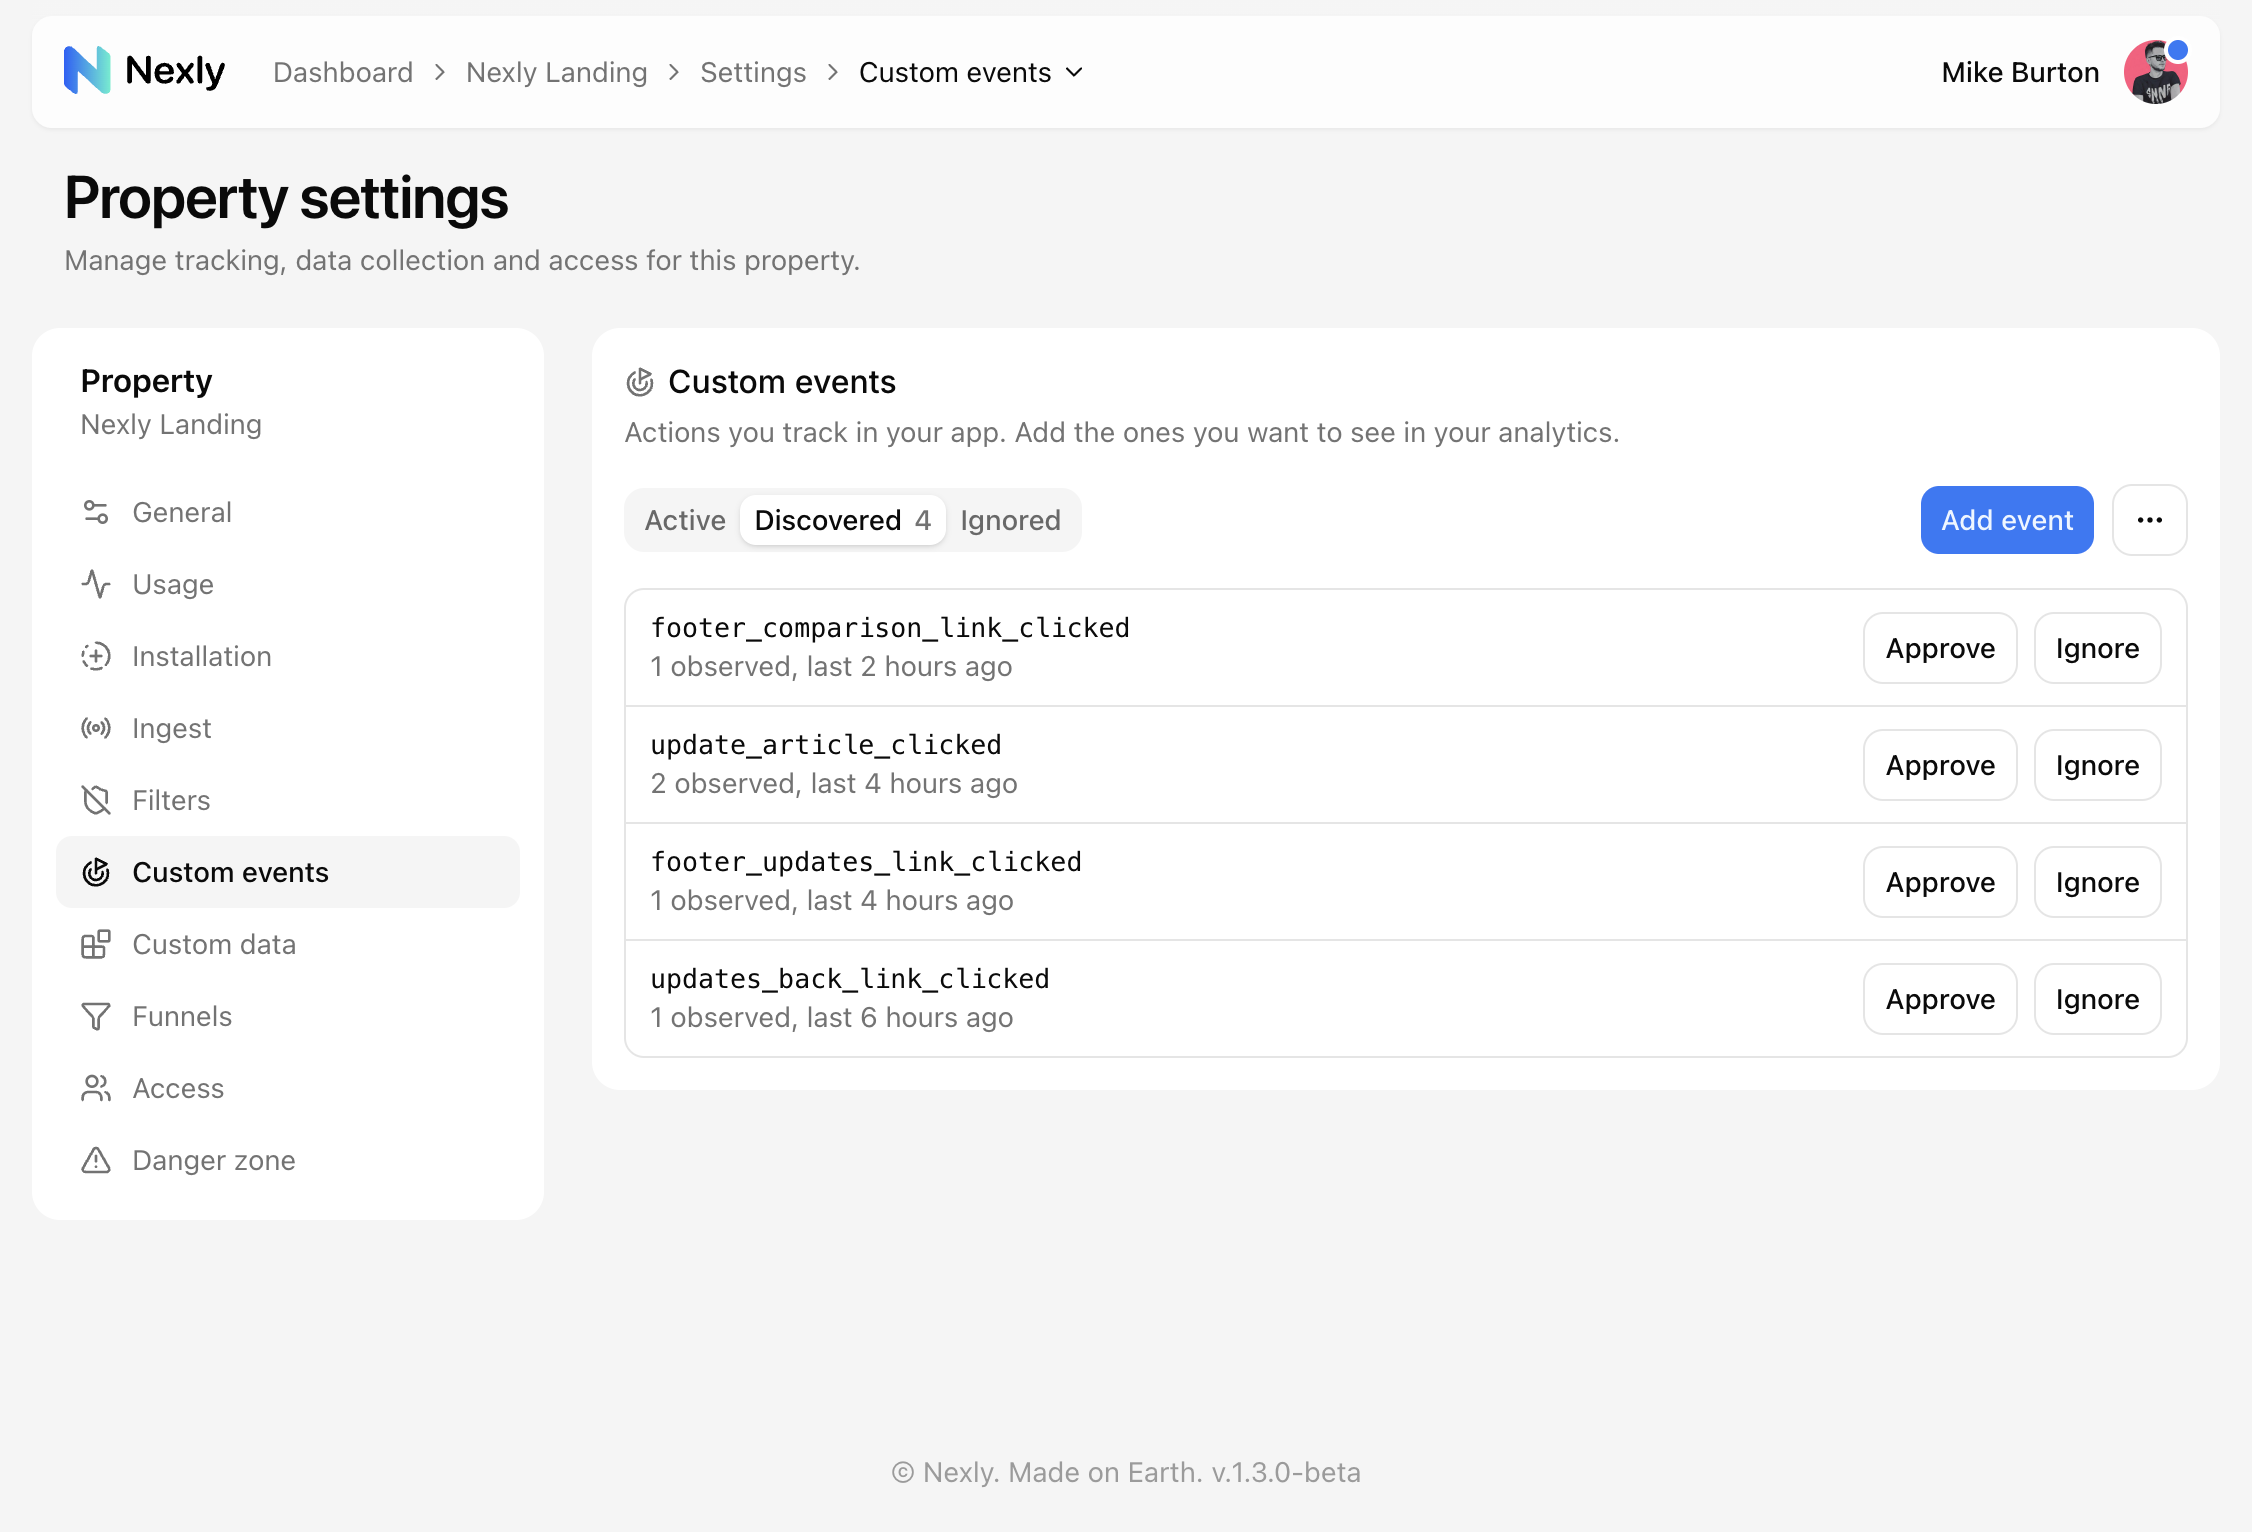
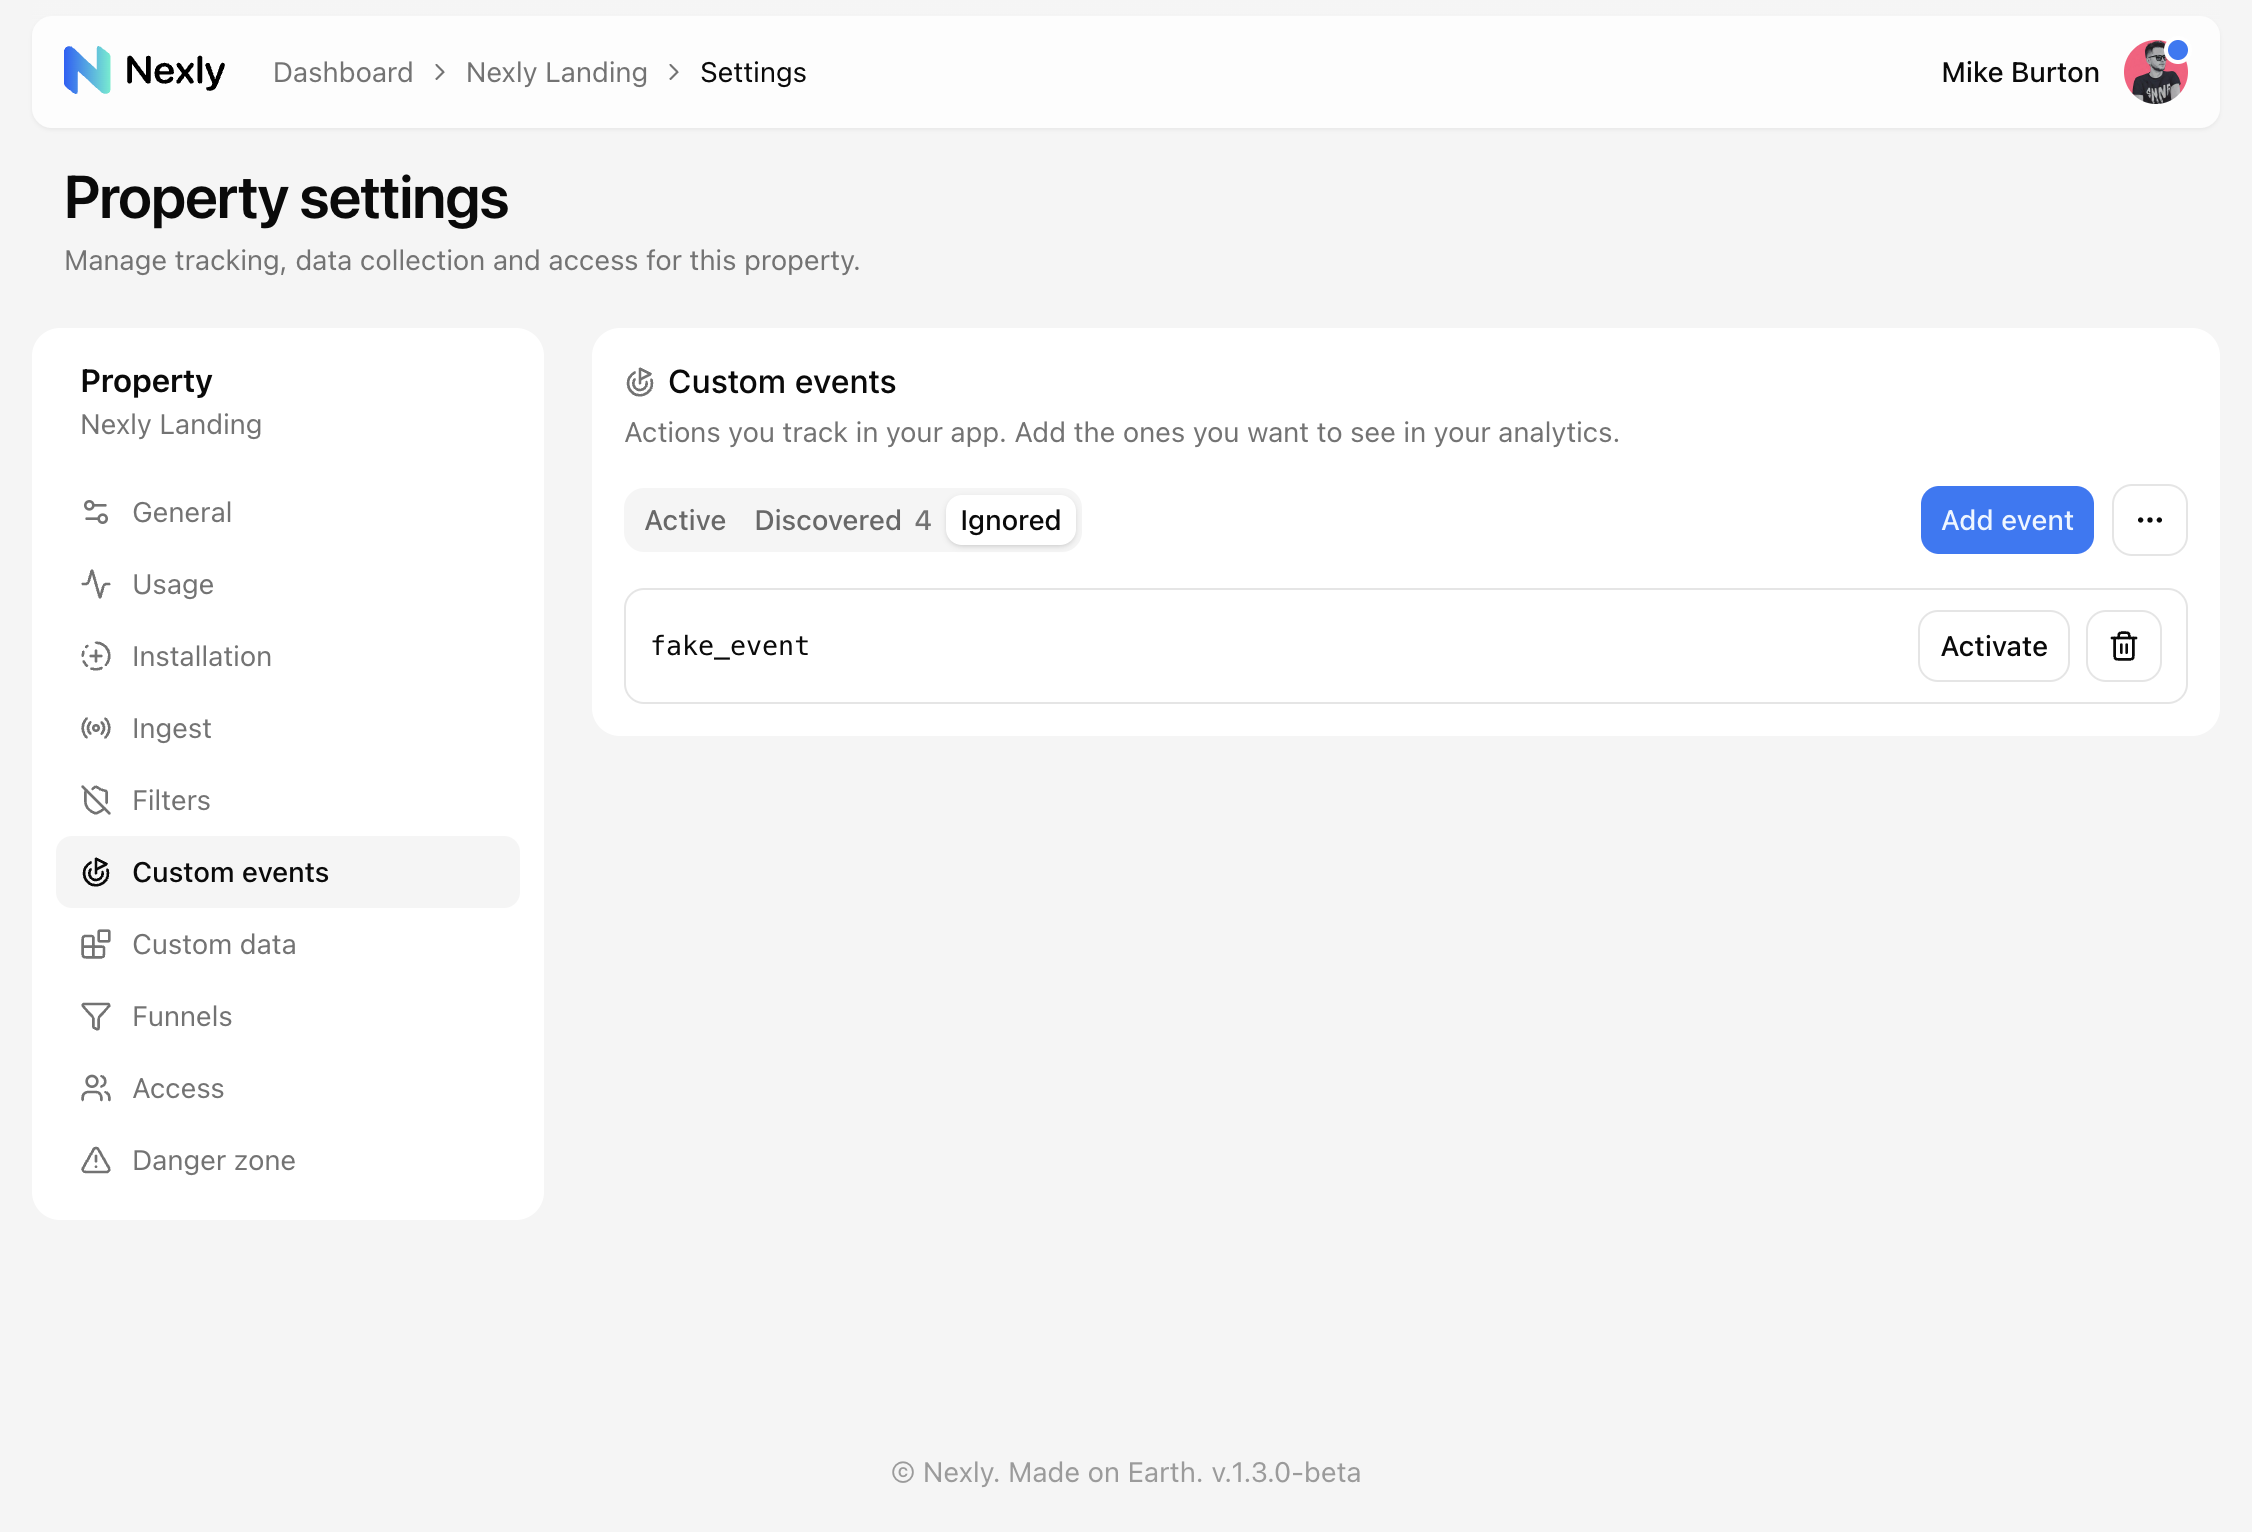
Each row can be Active, Discovered, or Ignored — switch between them with the tabs above the list:
- Active — the event is stored and appears in analytics. From here you can Ignore it or delete it entirely.
- Discovered — Nexly saw this name in incoming traffic but it is not approved yet. Choose Approve to start counting it, or Ignore to suppress it. Each row shows how many times the name was observed and when it was last seen.
- Ignored — the name is blocked. Future events with this name are dropped and will not show up again under Discovered. Use Activate to bring an ignored name back, or delete it.
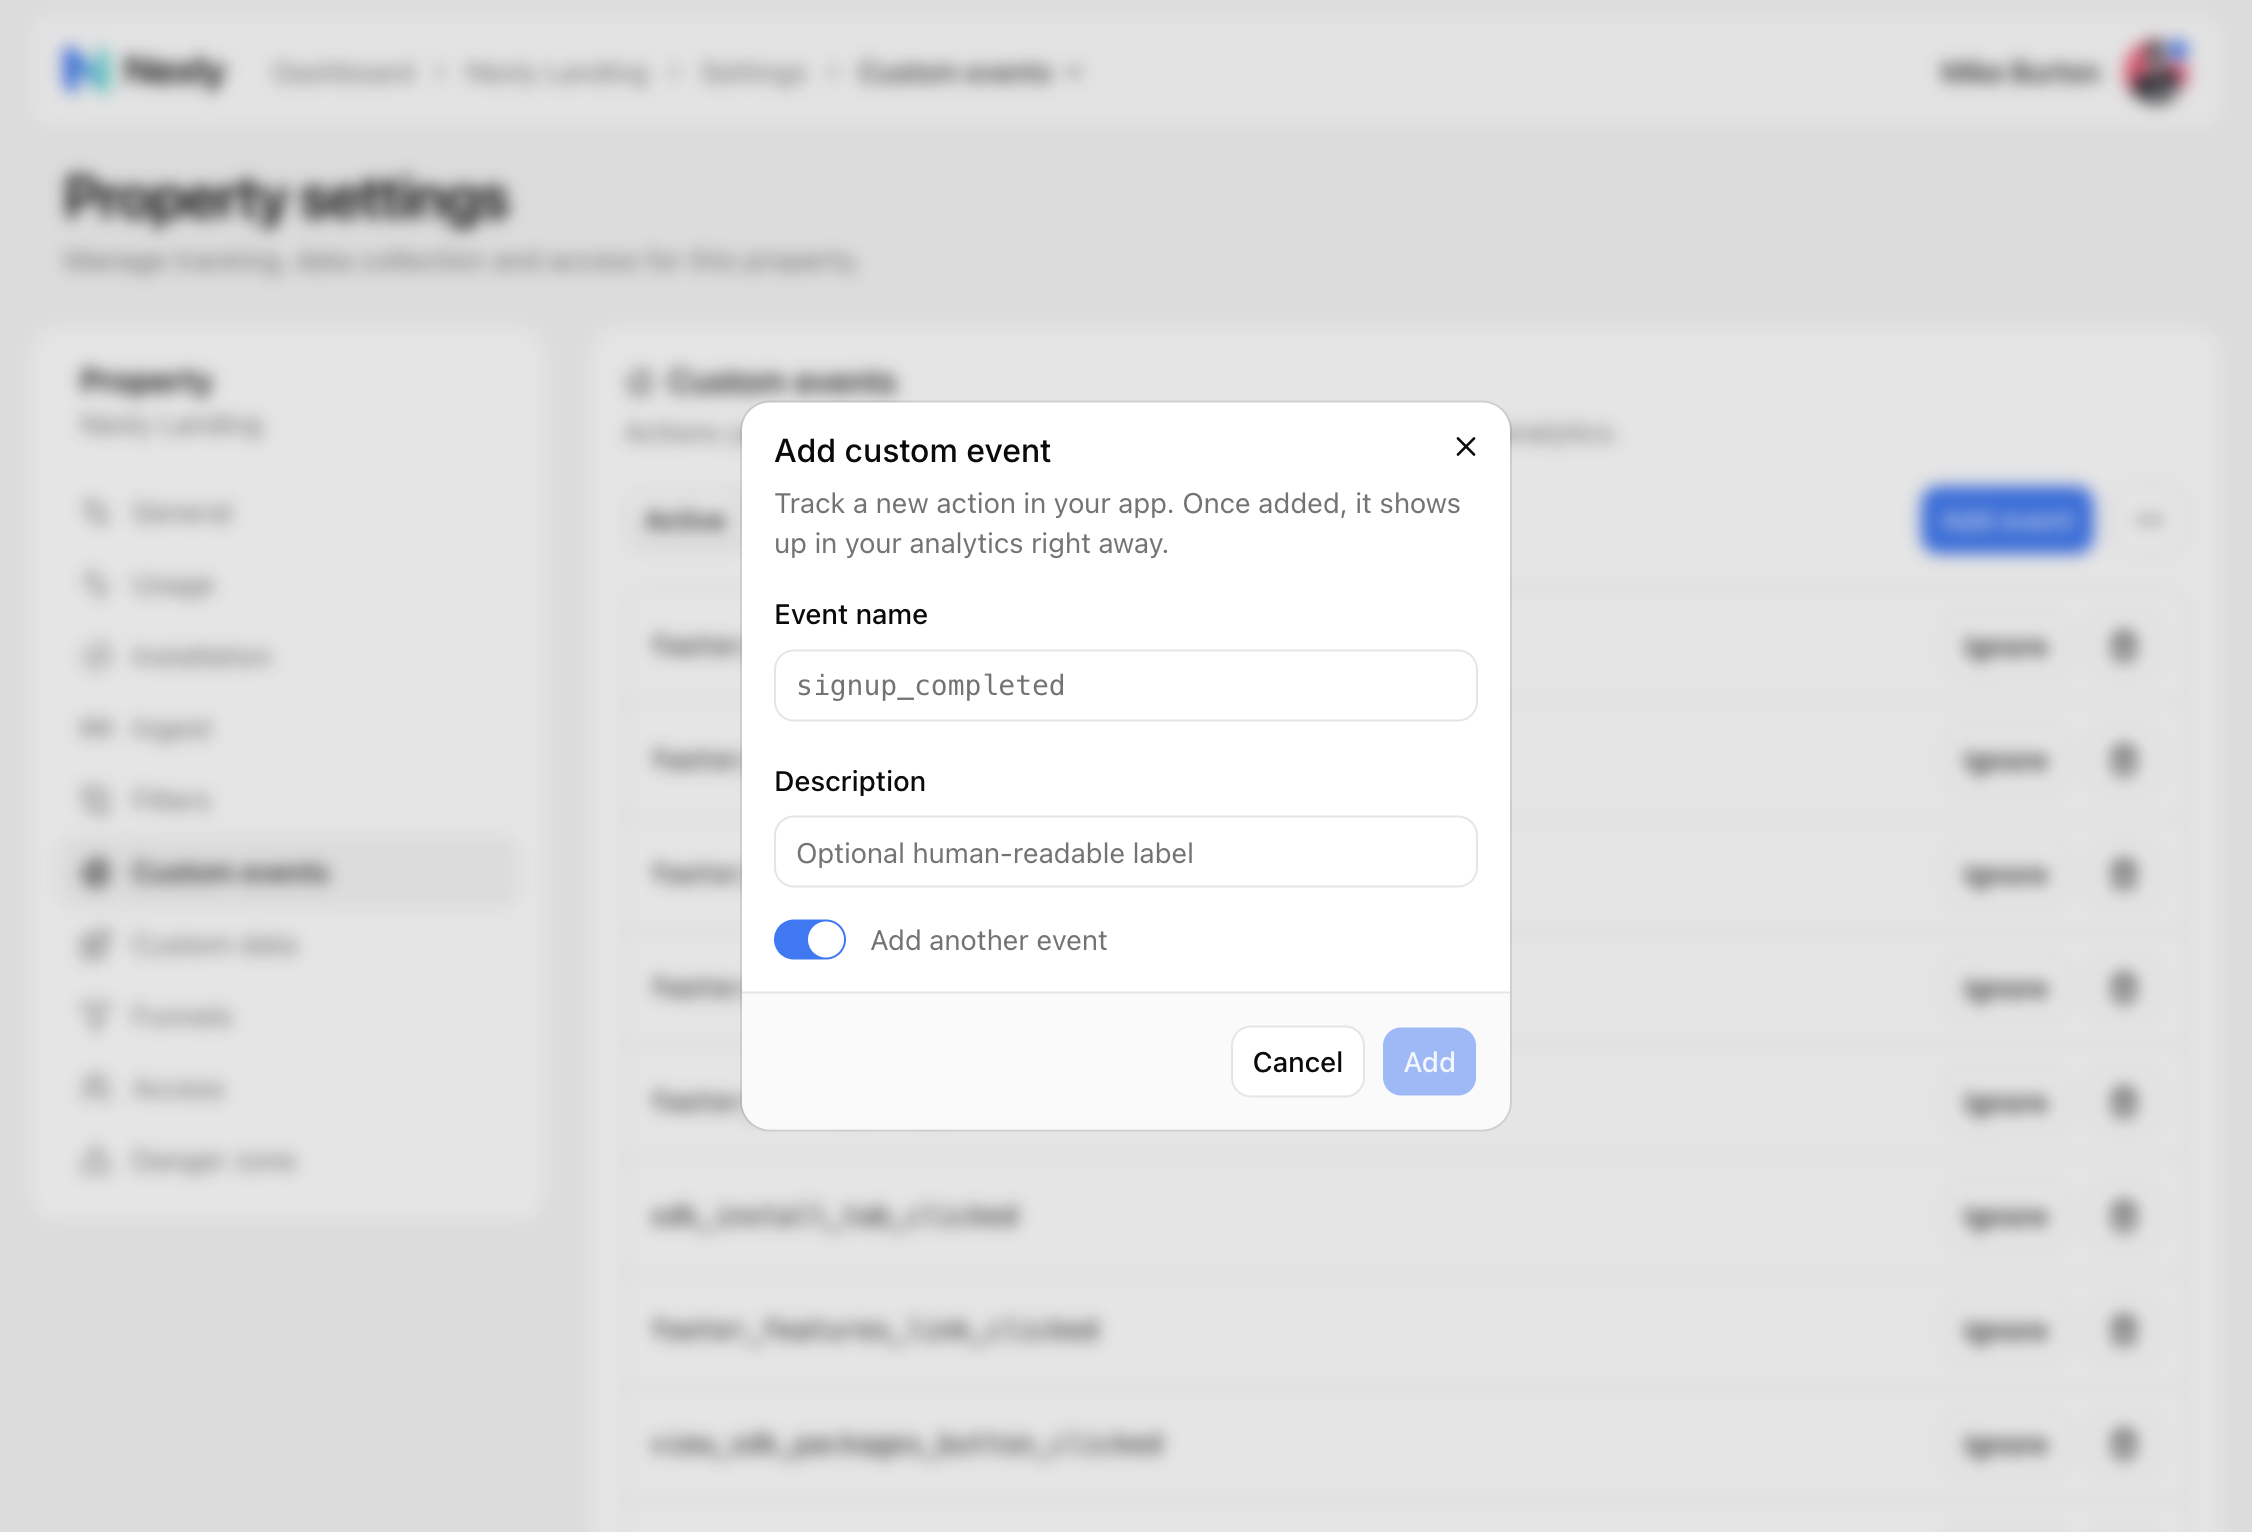
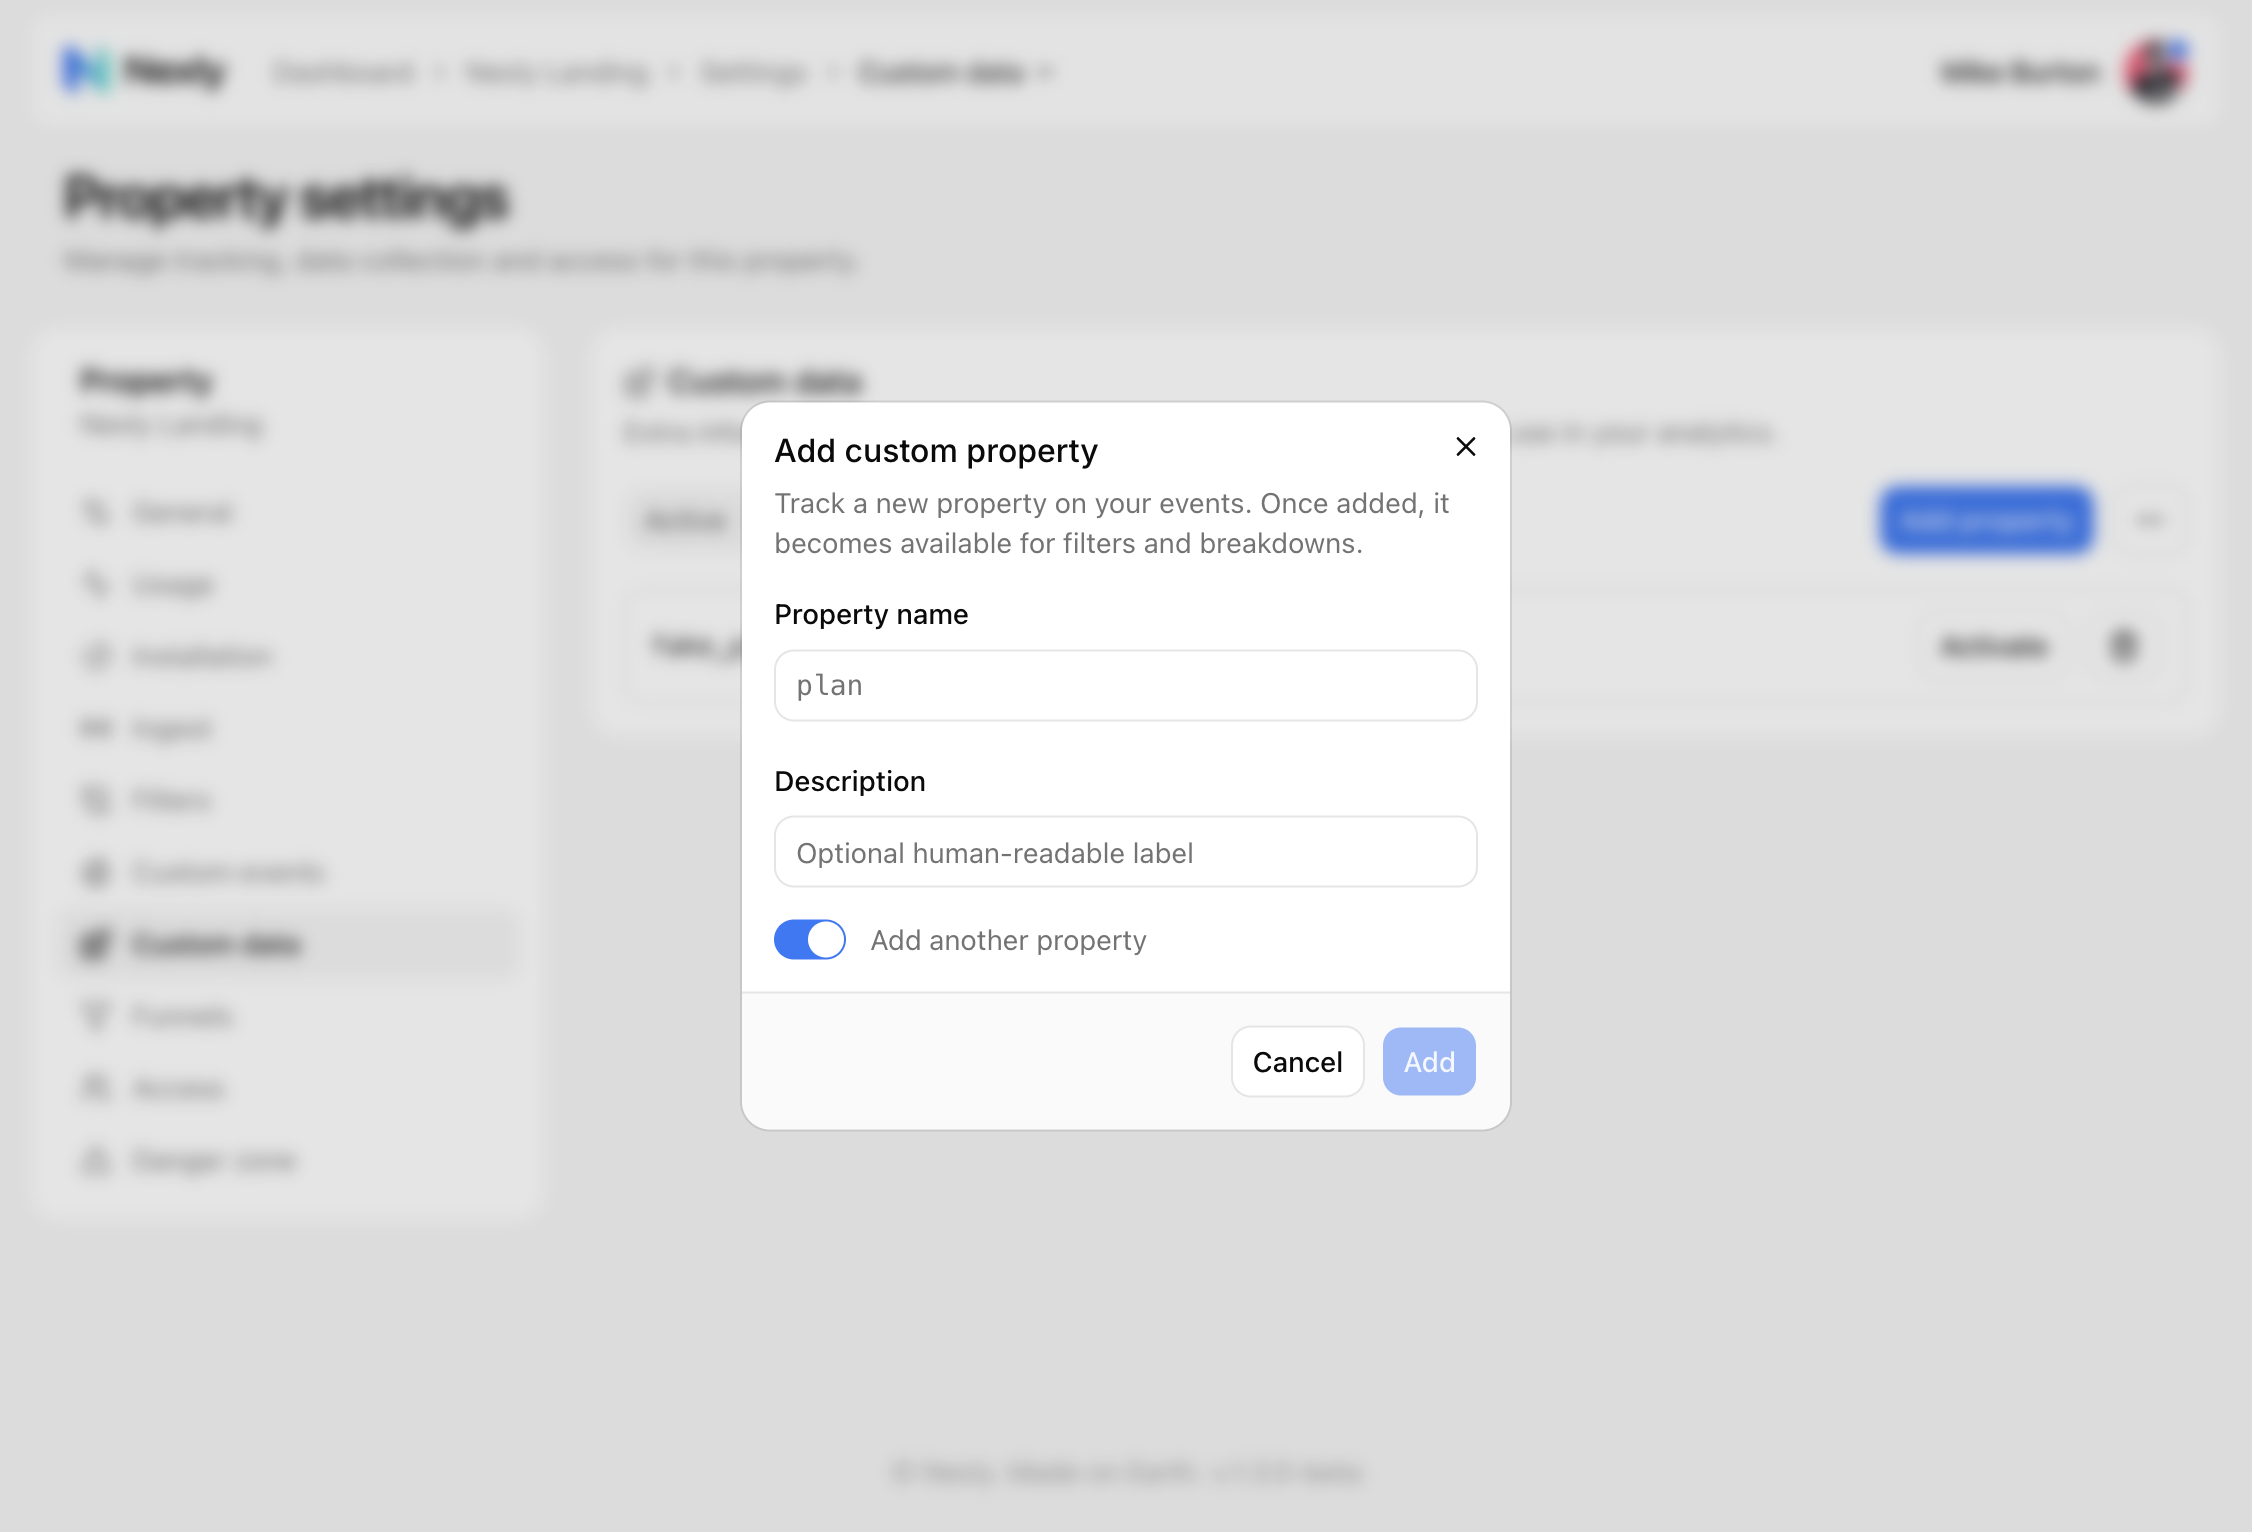
Use Add event to register a name before your code ships — useful when you want analytics ready on day one. You can add an optional human-readable description alongside the machine name, and keep the Add another event toggle on to register several names in a row.
Click an active event name to edit its name or description. Renaming does not move historical data — events already stored under the old name stay there.
Deleting a name hides it from analytics widgets; events already stored stay in the raw events feed. If your app keeps sending the name, it will reappear under Discovered.
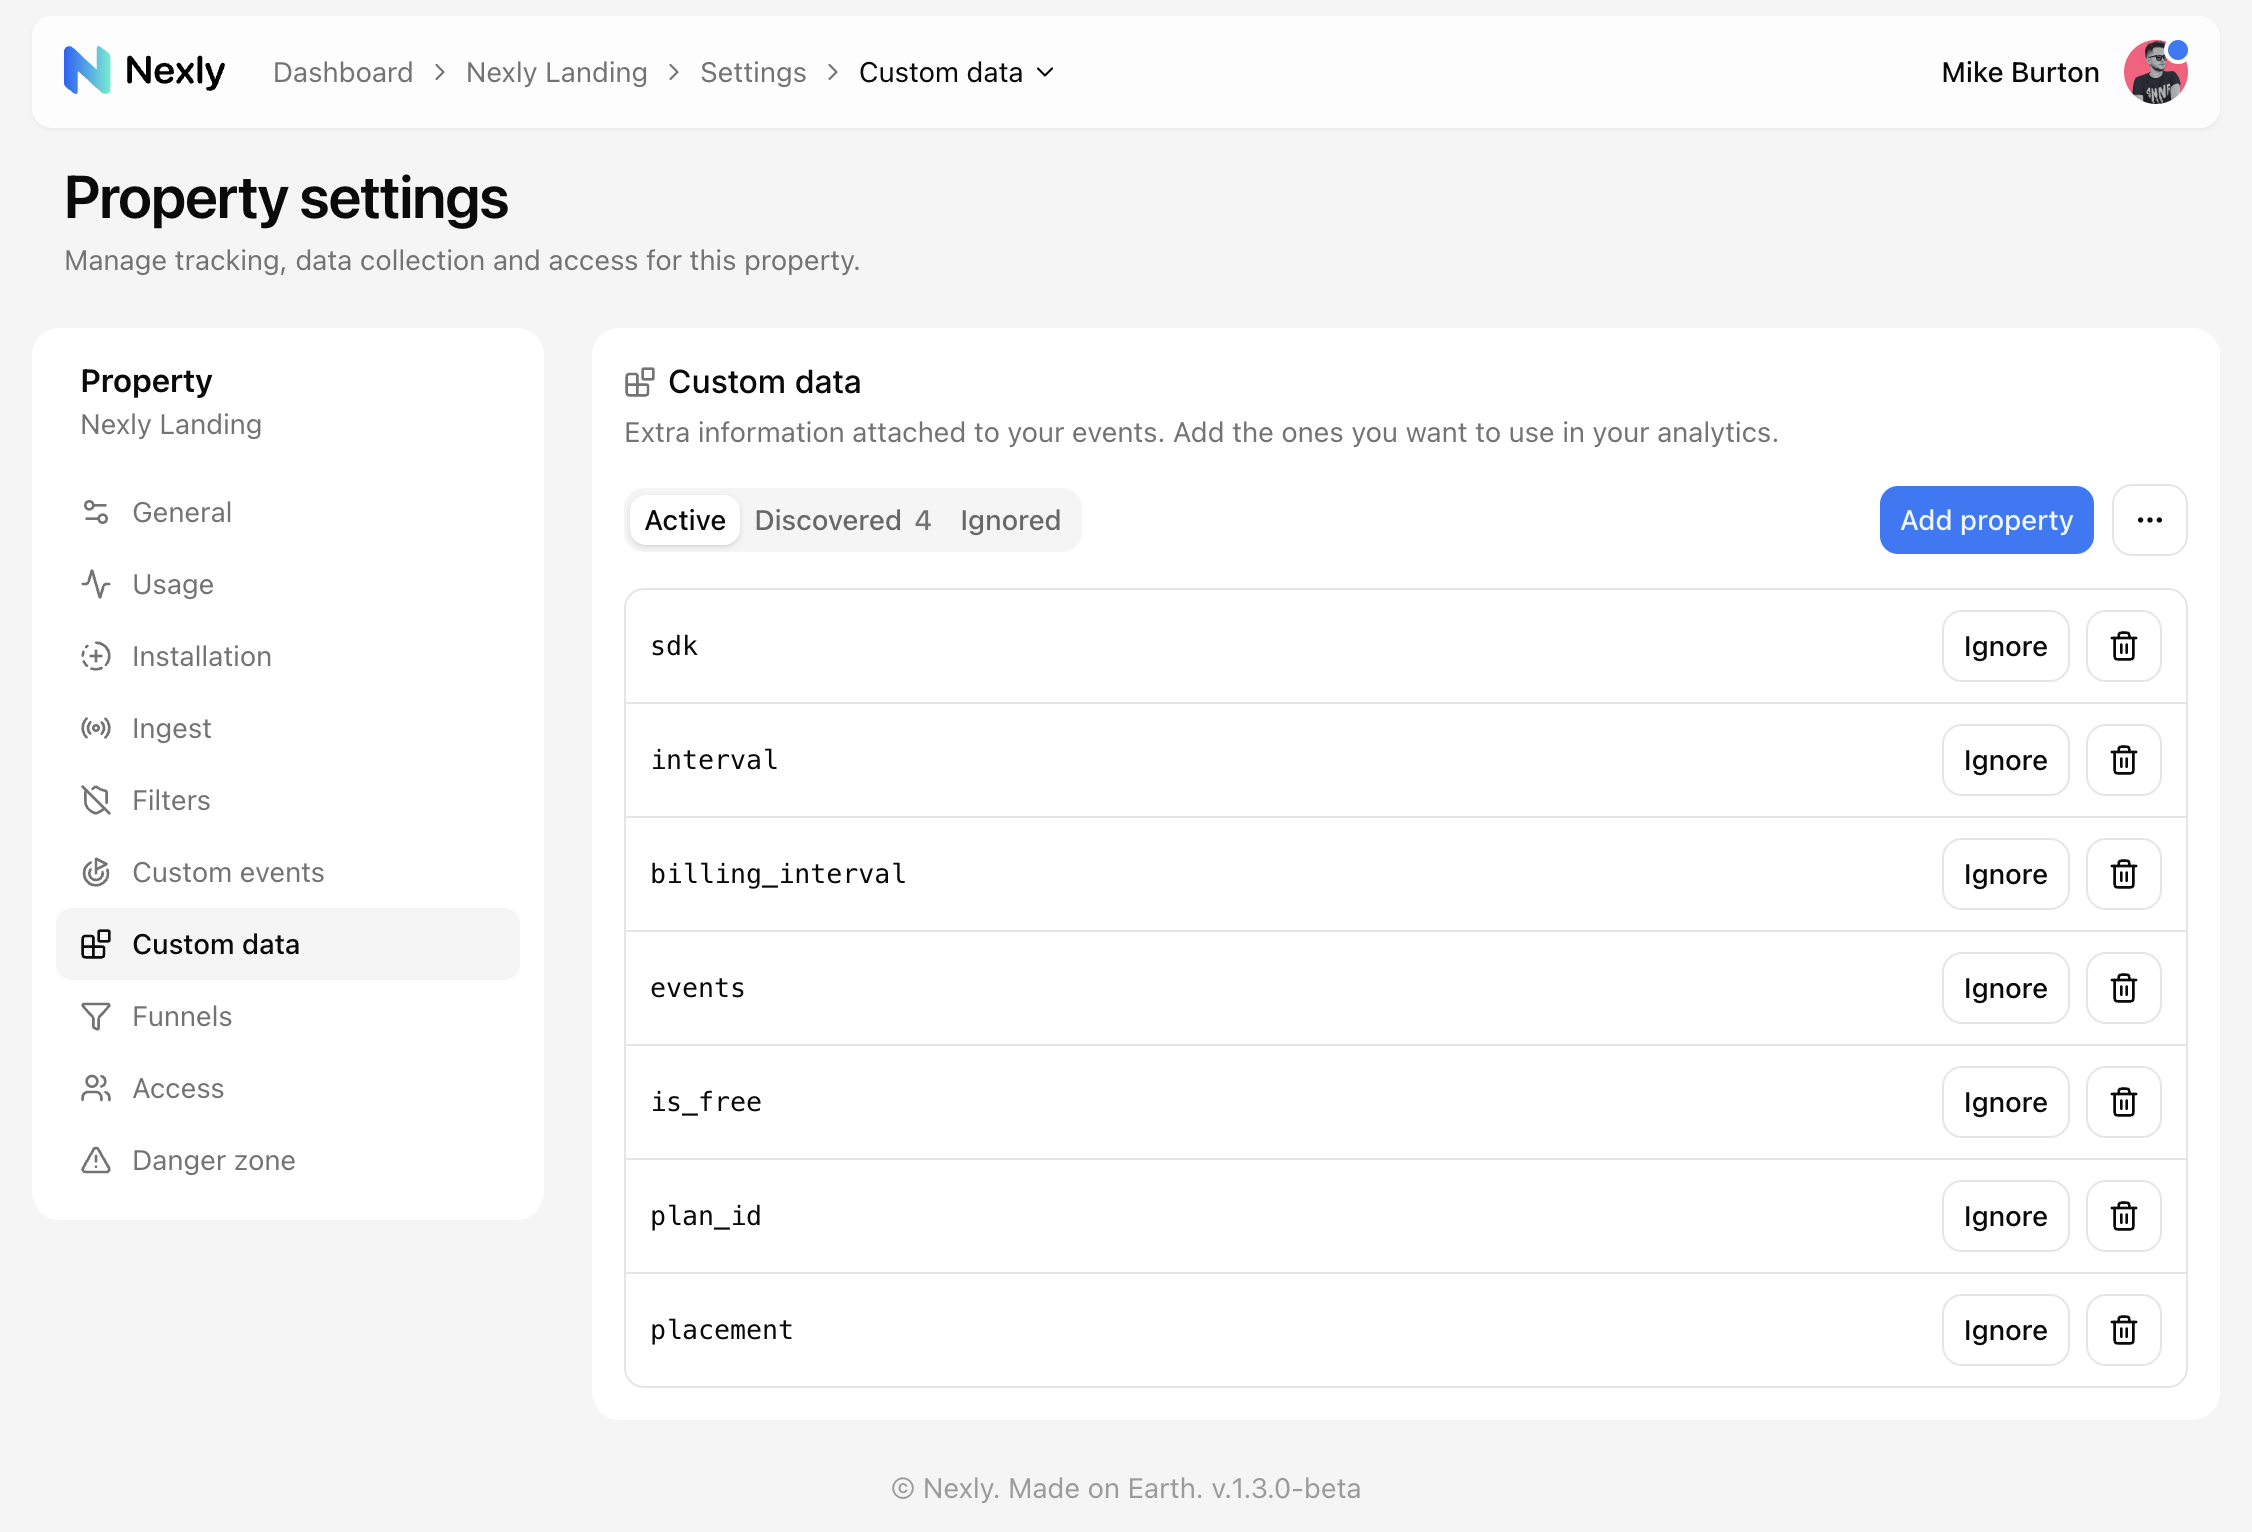
Custom data (properties)
The Custom data page works the same way for property keys. Approve keys you want to filter and group by in the dashboard; ignore keys you never want stored (for example legacy or debug fields).
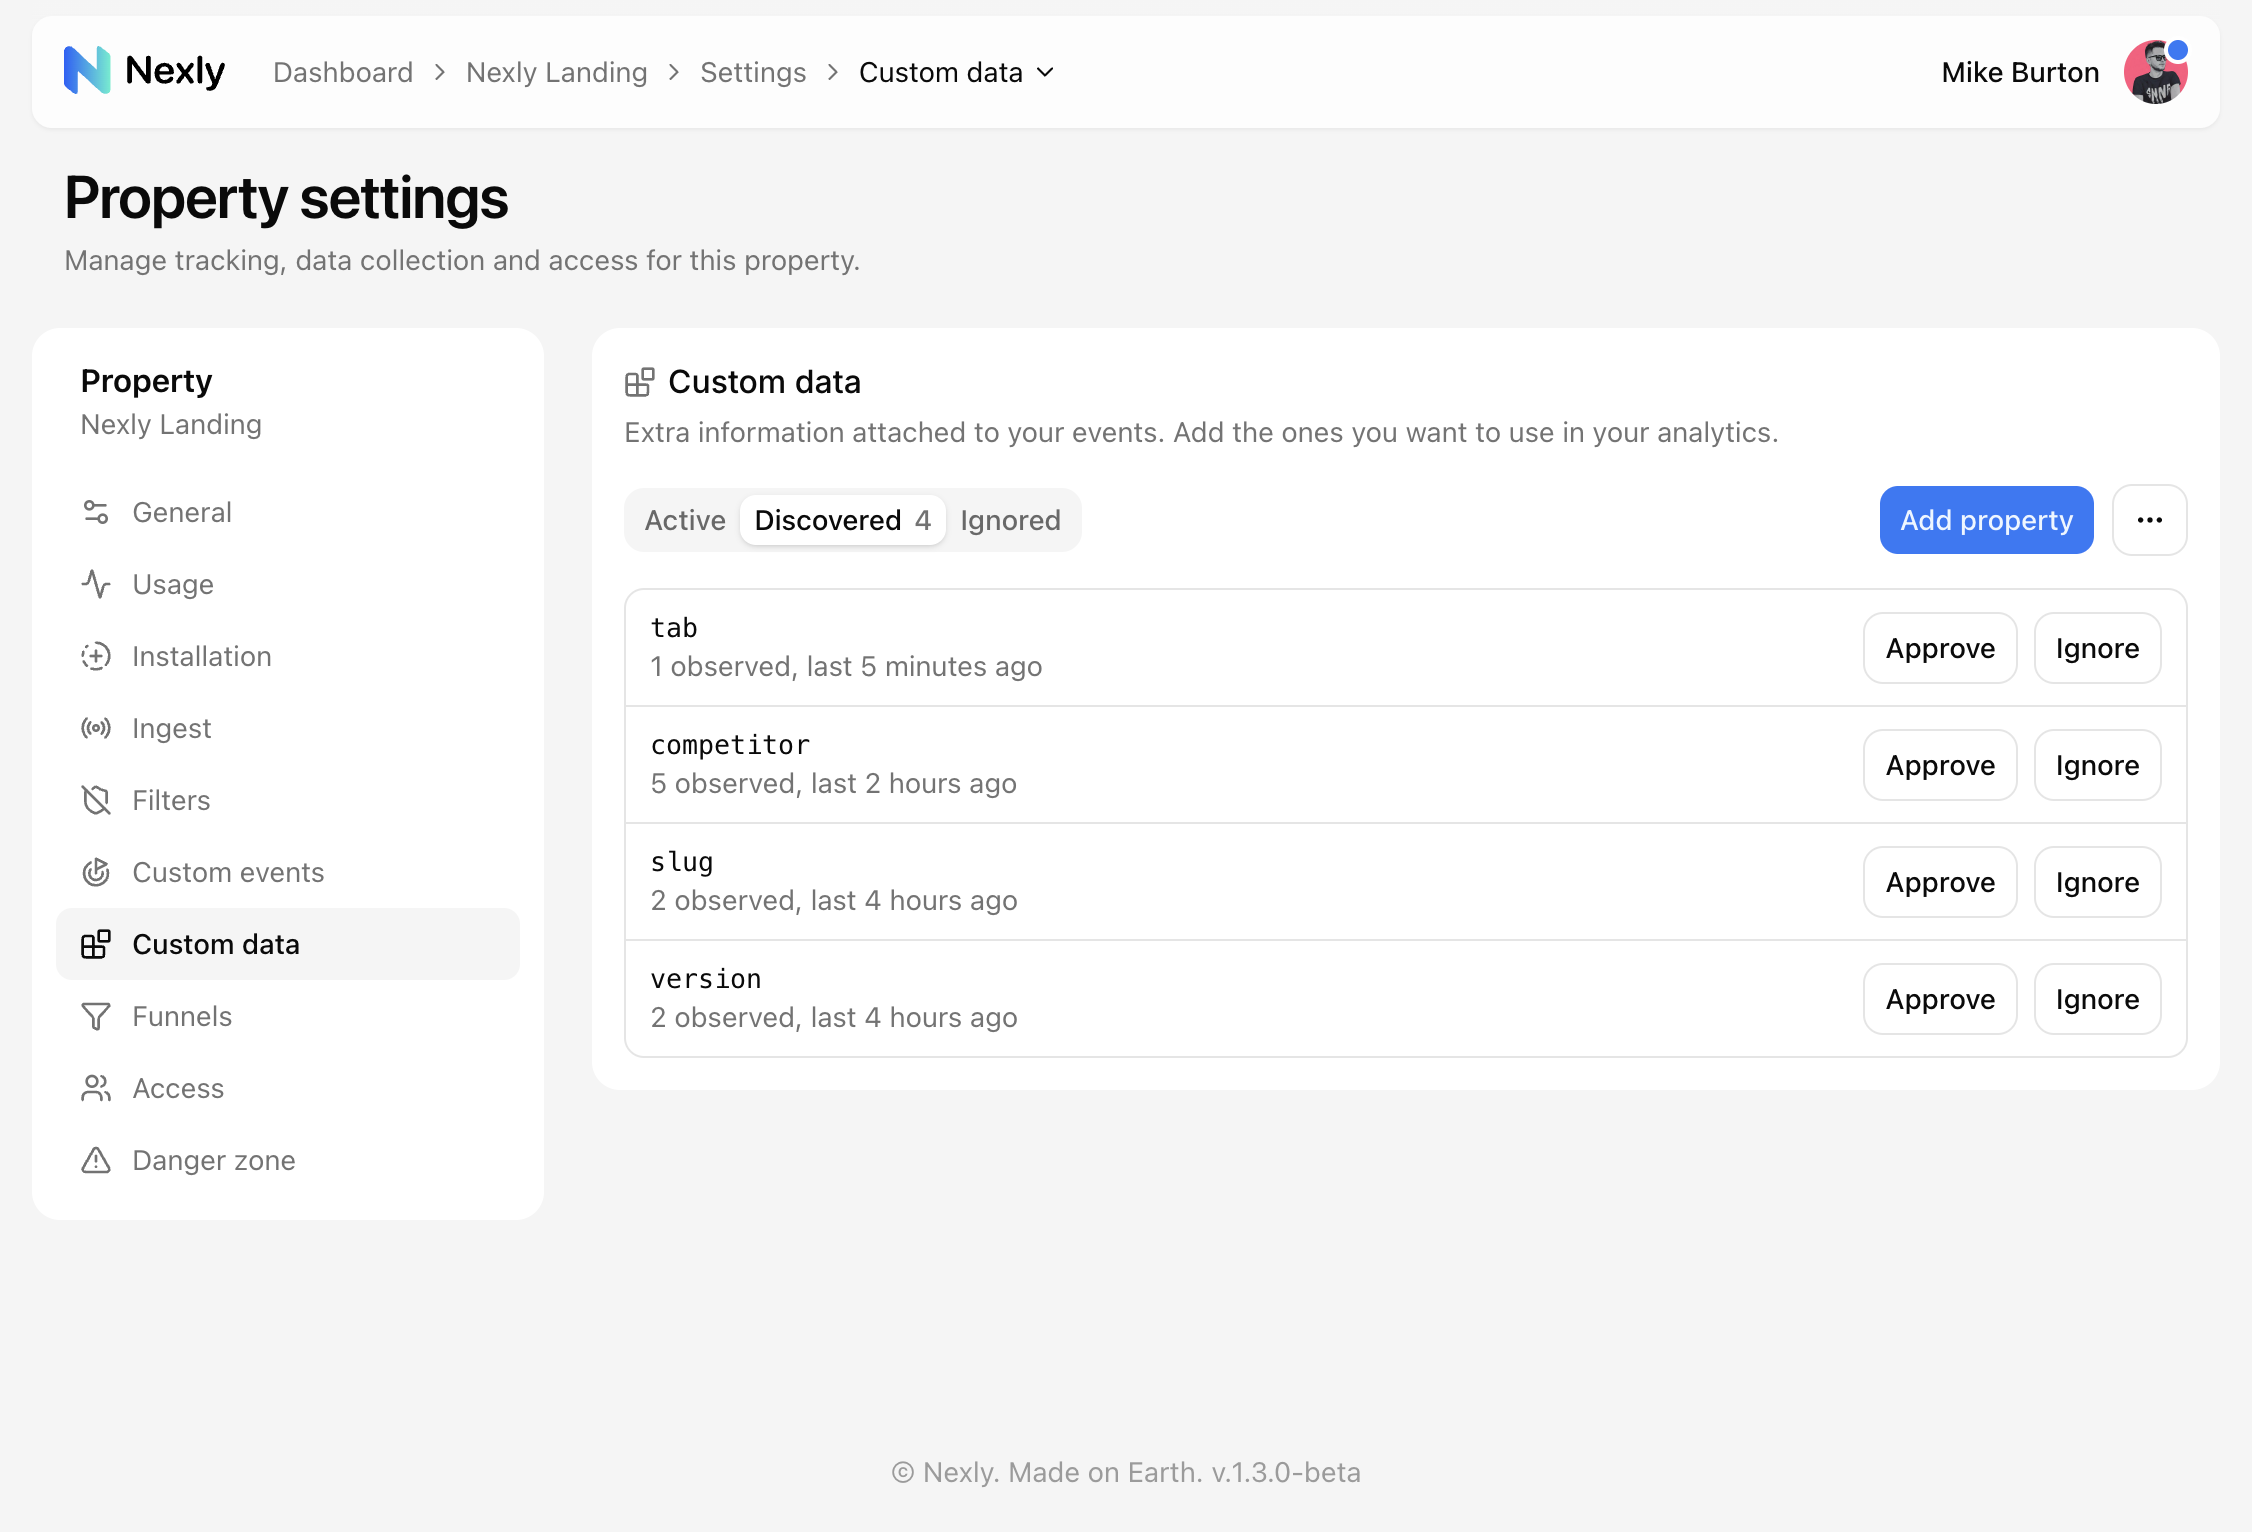
Properties discovered from live traffic land in the Discovered tab with an observation count so you can see how often each key appeared before approving it.
Use Add property to register a key manually — the dialog mirrors the custom event one.
Bulk actions and JSON import/export
When the Discovered tab has pending items, open the … menu in the toolbar to approve everything at once — no need to click Approve on each row.
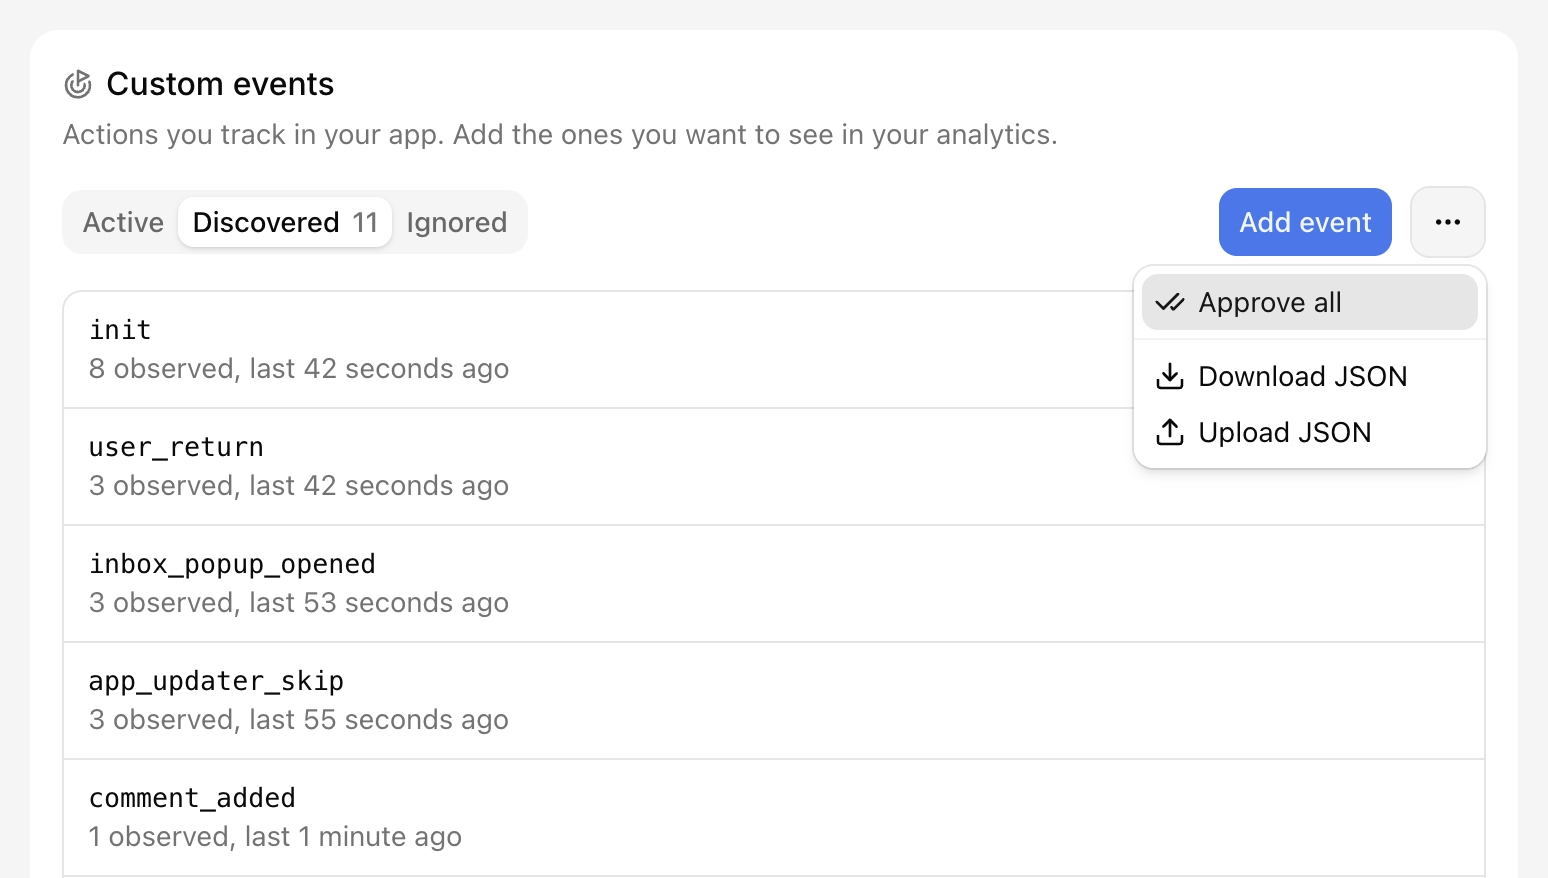
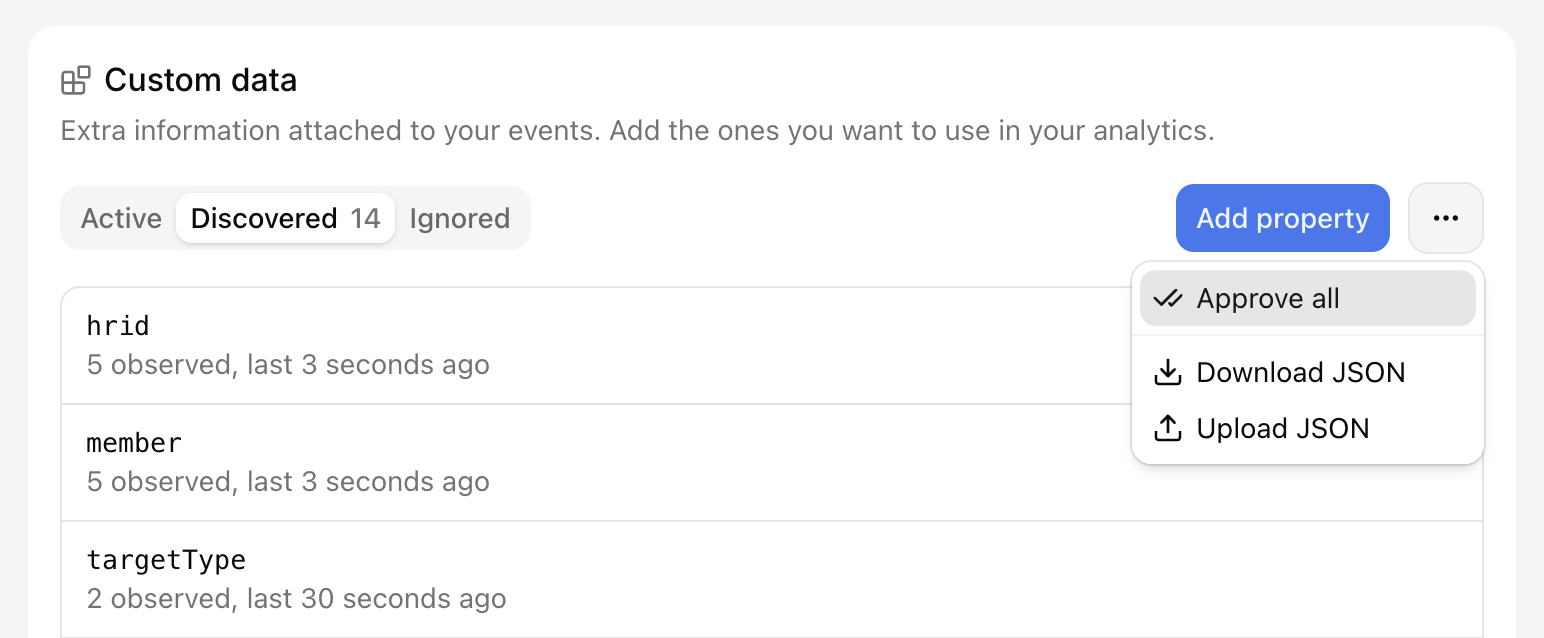
The same menu also offers:
- Approve all — approve everything waiting in the Discovered tab at once (shown when there is something to approve).
- Download JSON — export your registry (names, descriptions, and statuses) as a JSON file.
- Upload JSON — import a registry, for example to copy a tracking plan between properties or check it into your repository. Imported names become active (or ignored, if the file says so); names that already exist are skipped.
Step 3 — See them in analytics
After approval, custom events show up in several places:
Custom analytics widget on the property dashboard — visitors, conversion rate, and event counts per event, plus value breakdowns for a selected property. See Dashboard widgets for a tour.
Events page — browse the live timeline and see your custom event names alongside automatic pageviews and engagement.
Dashboard filters — click a custom event or property value in the widget to filter the rest of the dashboard to that slice.
Funnels — active custom events can be used as funnel steps, and active property keys as step data filters. See Funnels.
Historical data for an event or property starts from the moment you approve it. Events sent while a name was still Discovered are not backfilled.
Two ways to set up a tracking plan
Discover as you go — ship SDK calls, exercise the flows in your app, then review the Discovered tabs and approve what matters. Good for existing products where you are not sure of the full vocabulary yet.
Register first — add event names and property keys in settings (or import a JSON file from the toolbar menu) before deploying code. Good for new features or when several developers need a shared, stable naming scheme.
Both approaches work. Mix them freely: pre-register the important funnel events, let long-tail actions surface through discovery.
Quick checklist
- Install the SDK and confirm pageviews arrive (see Installation in settings).
- Add
customEvent(...)calls at the product moments you care about. - Use snake_case names and flat scalar properties.
- Open Settings → Custom events and Settings → Custom data.
- Approve discovered names and keys (or add them manually ahead of time).
- Check the Custom analytics widget and Events page to verify counts.
If something you expect to see is missing, check that the event name is Active and every property key you care about is Active under Custom data — unapproved custom events are accepted by the collector but not stored for analytics.